Add Live Activities Widget to iOS App
Live Activities on iPhone and iPad enable apps to display real-time data on the Dynamic Island and Lock Screen, featuring quick interaction capabilities.
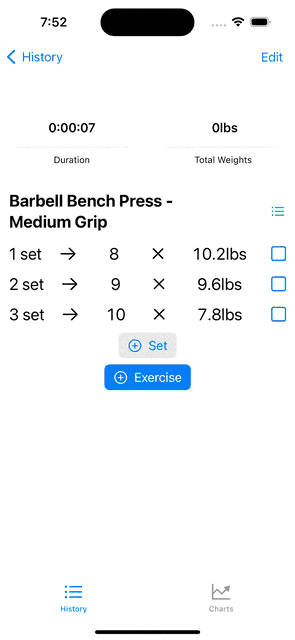
The following gif shows a Live Activity for an ongoing workout in my Gym Tracker app.
The Live Activity Widget appears on the Lock Screen across all devices. Devices supporting dynamic island support showcase the widget there, while other devices display it as a banner in the Notification Center. This post provides a concise guide on integrating this feature into an existing app. For more detailed information, refer to the respective documentation.
Implementation Steps
Integrating the above Live Activities into your app involves several straightforward steps.
1. Enable Live Activities Support
Add the entry Supports Live Activities with value YES to the Info.plst file of the project or the custom iOS target properties for the iOS app target.
2. Widget Extension Addition
The Widget implementation is part of a widget extension. If not present, add it to the project via File>New>Target>Widget Extension. Optionally, select the Include Live Activity checkbox to generate sample code.
3. Define Live Activity Data Structure
To transmit data from the app to the Live Activity, create a struct that conforms to the ActivityAttributes protocol. This struct contains static data, passed in when creating the Live Activity. The nested struct called ContentState describes the dynamic data used to update the Live Activity.
import ActivityKit

struct WorkoutAttributes: ActivityAttributes {
    struct ContentState: Codable, Hashable {
        let nextExerciseDue: ShortExerciseInformation?
    }
    let startTime: Date
}
The startTime is static data, needed during creation. The ContentState is updated during a workout and contains the name, repetitions and weight for the next exercise to display.
This struct is required by the Widget UI and the application code when creating and updating the Live Activity. Therefore, make sure to add the file to the Target Membership of the widget extension and the app itself.
4. Widget UI Definition
The UI is defined within the widget extension. OngoingWorkoutLiveActivityWidget delineates the views for various Live Activity configurations (Lock Screen/Notification Center, Dynamic Island expanded, compact and minimal). LiveActivityView defines the view for the Notification Center, resued for the expanded dynamic island. The latter could be modified to better suit the dynamic island.
import WidgetKit
import ActivityKit

struct OngoingWorkoutLiveActivityWidget: Widget {
    var body: some WidgetConfiguration {
        ActivityConfiguration(for: WorkoutAttributes.self) { context in
            // UI for Lock Screen/Notification Center and devices without dynamic island
            LiveActivityView(attributes: context.attributes,  state: context.state)
        } dynamicIsland: { context in
            // UI for the different dynamic island expansion states
            DynamicIsland {
                DynamicIslandExpandedRegion(.bottom) {
                    LiveActivityView(attributes: context.attributes,  state: context.state)
                }
            } compactLeading: {
                Image(systemName: "figure.strengthtraining.traditional")
            } compactTrailing: {
                    Text("\(nextExerciseDue.reps )x\(nextExerciseDue.weight)")
            } minimal: {
                Image(systemName: "figure.strengthtraining.traditional")
            }
        }
    }
}

struct LiveActivityView: View {
    let attributes: WorkoutAttributes
    let state: WorkoutAttributes.ContentState

    var body: some View {
            HStack {
                Text.init(timerInterval: attributes.startTime...Date(timeIntervalSinceNow: HOURS * 8), countsDown: false, showsHours: false)
                        .font(.title)
                        .frame(maxWidth: 100)
                    Spacer()
                    Text(nextExerciseDue.name)
                        .lineLimit(2)
                        .fixedSize(horizontal: false, vertical: true)
                    Spacer()
                    Text("\(nextExerciseDue.reps)x\(nextExerciseDue.weight)")
                        .font(.title2)

            }
        .padding()
    }
}
5. Widget Bundle Integration
To register the widget, include it in the WidgetBundle within the Widget Extension:
import WidgetKit
import SwiftUI

@available(iOSApplicationExtension 16.2, *)
@main
struct GymTrackerWidgetExtensionBundle: WidgetBundle {
    var body: some Widget {
        OngoingWorkoutLiveActivityWidget()
    }
}
6. Managing Live Activity Lifecycle
Finally, the application must utilize the ActivityKit APIs to start, update and end the Live Activity.
Start
    func startLiveActivity(attributes: WorkoutAttributes, state: WorkoutAttributes.ContentState) {
        guard #available(iOS 16.2, *) else { return }

        //the user can disallow live activities therefore do a check before
        guard ActivityAuthorizationInfo().areActivitiesEnabled else { return }

        let content = ActivityContent(state: state, staleDate: nil)
        do {
            liveActiviy = try Activity.request(
                attributes: attributes,
                content: content,
                pushType: nil
            )
        } catch {
            print(error.localizedDescription)
        }
    }
Update
    func updateLiveActivity(newState: WorkoutAttributes.ContentState) async {
        guard #available(iOS 16.2, *) else { return }

        guard ActivityAuthorizationInfo().areActivitiesEnabled else { return }

        await liveActiviy.update(
            ActivityContent<WorkoutAttributes.ContentState>(
                state: newState,
                staleDate: nil
            )
        )
    }
End
    func stopLiveActivity(finalState: WorkoutAttributes.ContentState) async {
        guard #available(iOS 16.2, *) else { return }

        guard ActivityAuthorizationInfo().areActivitiesEnabled else { return }

        await liveActiviy.end(ActivityContent<WorkoutAttributes.ContentState>(
            state: finalState,
            staleDate: nil
        ), dismissalPolicy: .immediate
        )
    }
Depending on the chosen dismissalPolicy, the final state will be shown in the Live Activity until it is removed.